Assignment #21A,B, and C


Assignment #22: Blocks with Precise Dimensions 1-12
1st Block
8 ft by 5 ft by 5 ft
2nd Block

8 ft by 5 ft by 5 ft
3rd Block
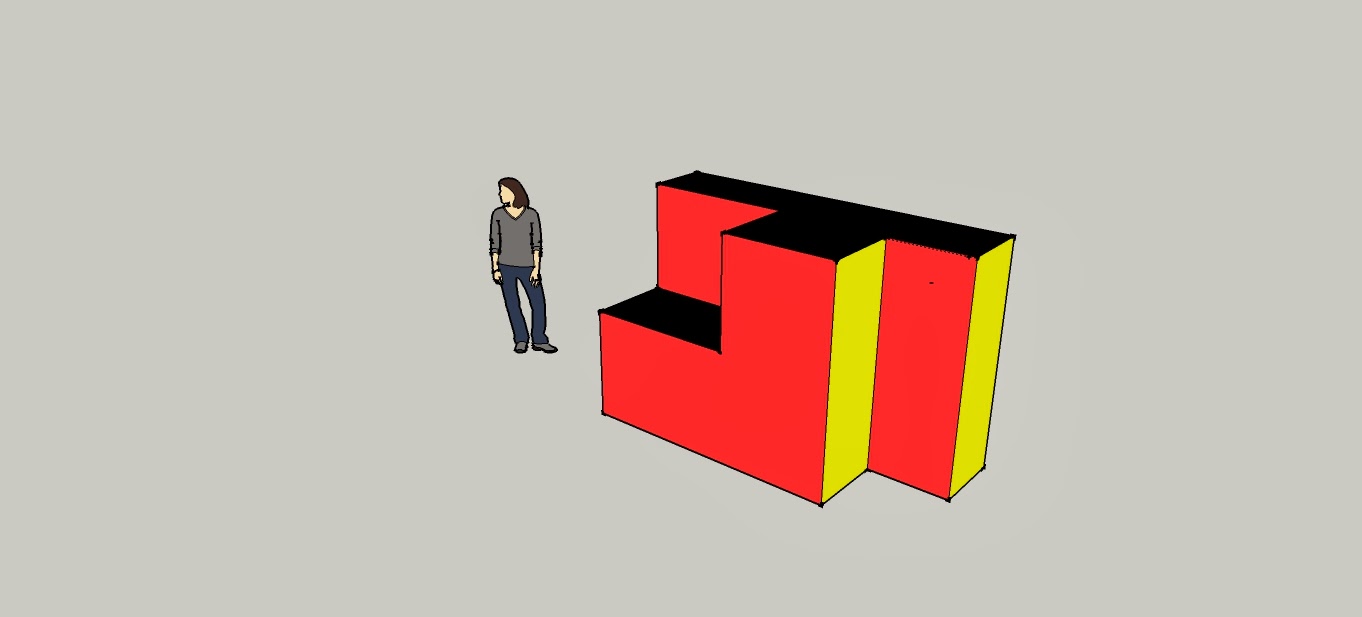
9 ft by 6 ft by 4 ft
4th Block

7 ft by 6 ft by 4 ft
5th Block

7 ft by 4 ft by 5 ft
6th Block

8 ft by 6 ft by 5 ft
7th Block

8 ft by 5 ft by 6 ft
8th Block

9 ft by 5 ft by 6 ft
9th Block

9 ft by 6 ft by 4 ft
10th Block

11 ft by 6 ft by 3 ft
11th Block

8 ft by 6 ft by 5 ft
12th Block

9 ft by 6 ft by 4 ft
Quiz Block #4

Assignment #23: Gingerbread House

For this assignment, I recreated a gingerbread house I found on Google with Sketch Up tools. First, I created the house using the Push/Pull tool and different widths, lengths, and heights. Then, I made different shapes for the windows, icicles, and gumdrops. For example, I used circles for the gumdrops and triangles for the icicles along the sides of the house. Also, I used different christmasy colors for the gumdrops like green and red. For the roof, I made white lines on it to represent the icing.
Assignment #24: 3D Gingerbread House

For this project, I used the my gingerbread house from before but added a 3D effect. To do this, I created two layers, a Background and Foreground. I opened my background on the Background Layer and put my gingerbread house on the Foreground Layer. Then, after duplicating my foreground and renaming it red, I moved it a little to the right to make it seem like its moving out of the background. Finally, on the Red Layer, I changed the channel to only red and on the other layer, I only unchecked the red layer. This is how I created my 3D gingerbread house.
Assignment #24B: 3D Person

For assignment #24B, I followed the same instructions I followed for the 3D gingerbread house. However, for this project, I used a floral background with hip hop artist Childish Gambino as the foreground.
Assignment #25: Animation Button

Quiz
1. What is GIF? According to the internet, a GIF is a loss less format for compressing image files. Also, it is an acronym for Graphic Interchange Format.
2. How does animation work? According to the internet, animation is the "technique of photographing successive drawings or positions of puppets or models to create an illusion of movement when the movie is shown as a sequence." I used this technique to make my button glow on a loop. I did this by making each frame have a .1 second delay.
Assignment #26 Test Part 1

To earn the first 100 points, I created the room using the guide lines on Photoshop and measurements given by the instructions. After this, I added the gradient styles over each layer of the room like the ceiling, side walls, floor, etc. Finally, for this part of the test, I added the ceiling lights and started to make the spotlight for each position of the shoe.
Assignment #26 Test Part 2

For this assignment, I had to first create a room to showcase my shoe. To create the room, I followed the instructions on "http://photoshop-plus.co.uk/2011/09/21/learn-how-to-create-your-very-own-showcase-room/#more-648" First, I made the foundation of the showcase with specific measurements like 162x37 pixels and added dimension by caving in the ceiling and floor inwards. Then, I added a gradient to every part of the room like the floor, side walls, ceiling, etc. After this, I created the lights with the ellipse tool and copied it two more times to make three lights. Then, I created the spotlights using the same tool but I added a Gaussian blur. Finally, I added in pictures of the shoe in different positions like the front, back, and side. This is how I created my showcase project using Photoshop.
Assignment #27: Making a Brochure with Publisher


For this project, we went back to using Illustrator to create a brochure. In this brochure, I included details on my school life and how I use MTA to get to school. However, in the right panel, I put information about my school, Manhattan Center for Science and Mathematics, and the bell schedule. In the middle panel, I put a brief description about my school life and then how I get to school. Then, in the remaining panels, I put the classes I take during the day in order. For example, in the left panel, I put my first, second and third class, which is AP Spanish, Geometry, and Physical Education. I included information about the class and textbooks used, if any. I continued this until my last period which is Multimedia! This is how I created my brochure using Illustrator.
Reflection on entire semester...
During the semester, I learned about 5 programs. The first program I learned about was Microsoft Publisher. With this, I created a business card, postcard, and brochure. Then, I used Microsoft Powerpoint to put together a portfolio of my work for the first marking period. After, I learned about Adobe Photoshop. With this, we did most of our projects like the showcase and glowing power button. After Photoshop, we learned about Adobe Illustrator. Using Illustrator, I created the USB and the phone test project. Last program I learned about was Google SketchUp. With SketchUp, I made the Isometric Blocks and the Gingerbread house. As I prepare for the next elective course, I will use the many shortcuts I know in each program that will make creating any project after these faster and easier.